Showing posts with label DIY. Show all posts

Tuesday, July 12, 2016

Toolbox Giftbasket

Toolbox Giftbasket

for
Him or Her


    Enlarge this design to whatever size you need.The length can be adjusted to however long you need. I recommend recessing the dowel handle or even drilling a hole all the way through for the dowel. Then hold in place with screws and or glue. Make sure you use the appropriate length screws and glue for the bottom and sides. Sand the sides of the project so that you can stain the wood afterward, but painting or decorating the box would probably also work. 
    Once you're finished with the project all you have left to do is to fill it with your favorite goodies for your favorite person and you will have a gift they will not soon forget. I love this project because it is such a versatile gift that can be given to him or her. It leaves them with something to use after they have consumed the goodies inside and could be used as a toolbox or even a planter for the front porch.

Be sure to checkout our web site www.nevadacrafter.com and our other blogs http://craft44.blogspot.com/ and http://nevadacrafter.blogspot.com/

Monday, June 27, 2016

DIY Bottle or Jar Cleaning Brush

Bottle or Jar Cleaning brush

This is a simple project with three main parts.
You will need the following.
  1. Wooden spoon
  2. Mop yarn
  3. 4 inch foam mini paint roller
  4. Hot glue - high temp.
The tools you will need are as follows
  1. A sander of some type either belt sander or Dremel tool
  2. quarter-inch drill bit and drill
  3. hot glue gun with high temp glue.
Take the wooden spoon and sand the handle down just enough to fit inside the paint roller. Then drill 1/4 inch holes in the lower half the spoon, as shown here.
Then using a hot glue gun inject a small amount of blue inside the paint roller and long handle. Insert the handle into paint roller and immediately cool with cold water. The cold water is to keep the foam from melting and two quickset glue. Once you have glued the foam roller onto the handle it should not turn. If the roller rotates on the handle it will not do a very good job in cleaning bottles or jars. After you have assembled the foam handle you can use a crochet hook or latch hook or even micro forceps as seen here, to assemble the mop yarn. Mop yarn may be hard to come by at craft stores so I simply bought a mop from the dollar store and cannibalized it for the yarn. Yarn should be 6 to 8 inches in length and can be added to the spoon by either using half hitch knots or double knots on either side of the holes, so as to prevent the yarn from pulling through. You may want to add two or three strands per hole in order to get the right density of yarn. If you find that after assembly yarn is still too long you can simply trim with scissors. Once you have finished this your project is complete and you now have the best bottle brush ever. It's makes a great gift or a great project just for yourself.
    If you're going to make these for sale it is important to keep in mind that the cost of your materials is critical to whether it is profitable. Most of the materials were purchased at a dollar store and the cost of materials was kept under a dollar. Where you may lose some money as with any crafts is with the amount of time spent in creating the item. This may be offset by adding the item to a gift basket or similar project.  It may be possible to save a little bit of money by cutting out your own spoons out of quarter-inch wood stock. 
   

Thursday, June 23, 2016

Nevada crafter contest winner for the month of May 2016

Congratulations to Lisa Hess for being the month of May Nevada crafter contest winner.

Be sure and check our website and blogs for future contests and contest rules.
www.nevadacrafter.com

http://craft44.blogspot.com/

http://nevadacrafter.blogspot.com/

Monday, March 21, 2016

How do you irritate a bird that wants to roost?

 Creating bird spikes with 3D pen

    In my first attempts at creating bird spikes, I simply used a quarter round or half round piece of old molding. Using a 16th inch drill bit I drilled numerous holes and then used the 3-D pen to partly fill the hole with extrusion from the pen and then moving outward creating spikes. 

     Although the finished product did not give me the rigidity in the spikes that I wanted it still seemed to work. 

In my last attempt I ran a bead of plastic at the bottom. This created better adhesion and stability to the spikes. I also tried creating lattice to give it additional rigidity, although I'm not sure that it was needed.
    The spikes do not harm the bird as they are not sharp enough or stiff enough to do so. They end up being more like the bristles on a soft broom and more of an obstacle that the bird can't quite figure out how to get around.
    A piece of styrofoam could be used in place of the wood, making it light enough to be stuck to a wall with poster putty. This might work great with woodpeckers and flickers that tend to roost on the sidewalls or under eaves .

Note: The Styrofoam will melt some with the 3D pen, so use gloves and some caution when working with it. 


     I look forword to hearing any constructive ideas or suggestions. Be sure and check out our other posts, blogs and our website www.nevadacrafter.com

Saturday, March 19, 2016

Do you need washers for your craft projects?

Washers for whirligigs


FOR SAFETY REASONS NEVER USE THESE WASHERS TO REPLACE PARTS ON COMMERCIAL PRODUCTS. 

Always use the manufacturer's recommended replacement parts.


    Nylon washers are not very cheap, but I have found an alternative that cost next to nothing, helps the environment and works almost as well. 
    One of the things that I do on a yearly basis is to do preventative maintenance on my whirligigs and weathervane's. With all the moving parts and high winds, there is a lot of wear and tear on these mechanical wonders. What I found out is metal on wood wears out the most, so I use a lot of plastic or nylon washers. Although washers are not the most expensive part to a whirligig, they can cut into your profits.

  I couldn't help, but share this money-saving and environmentally friendly up_cycling of plastic jugs. As for the patterns, I simply invested in an assortment of metal washers to use as a template for the various size washers that I use in my whirligigs. After all for a couple of bucks worth of cheap metal washers, I now have a set of templates that are worth the investment and will never wear out. I could've very easily used a compass to draw the circles, but I wanted something that was more consistent with actual washers.

    
(Be sure to use the appropriate safety goggles and other safety equipment when using rotary tools)

    I have found almond milk jugs and other opaque or heavier jugs seem to make the better washers. Anyhow, using a metal washer as my template and a black marker to trace around the metal washer, I create my patterns. Usually, I take the time to make several hundred at a time, so I have washers on hand for later. Then I simply rough cut them using heavy-duty utility scissors, dollar store kitchen scissors or a Dremel with a fine tip rotary cutting blade. (An X-Acto knife on a cutting board will also work as well.) I then finish the washer by sanding the edges or dragging a knife blade crossways against the grain to remove any ragged edges. A Dremel with an abrasive bit also works very well.

For those of you who like to do things the hard way I have included the following photo as a pattern.
Now keep in mind these washers will not necessarily take the place of a heavy-duty nylon washer and will most likely biodegrade over time if exposed to sunlight.


 For other craft projects and ideas be sure and check out our other blogs and our website at www.nevadacrafter.com

Wednesday, February 3, 2016

DIY Drawing Compass

DIY Drawing Compass

A drawing compass can come in handy, but most are the size kids use in school. I quickly found out that here locally, there were no large compasses to be had. Not only do they come in handy for my own art work, but there is some demand for the compasses them selves. So I present the following approximate pattern and photos of the one I made. 


(Please note: pattern may not be exact or to scale and some adjustments may need to be made. The pattern is presented as an approximate to the original and is intended as more of a guide. It should also be noted that the pattern may need adjusting depending on materials used and thickness of wood or other materials used.)

Note: 1/4 " wood was used

I used glue to hold and position the mechanical pencil and metal point. I then used wire to hold them in place while the glue set and left them in place to add strength. Any point can be used for the fulcrum, such as a nail, push pin, ect. 
Of course when I am making them for sale, I take care to use much nicer material, such as brass nails, ect. The size circle you can draw depends on how long or how many joints. A second screw and wing nut in the middle of the fulcrum, but I find it just as easy to just make the compass bigger. 
    I hope this idea is of help to the crafters and artists out there that need to make big circles and great art. Thank you for taking the time to read my blog and please check out our other blogs and subscribe. Please feel free to make constructive comments or suggestions.

Thursday, December 10, 2015

Quick and easy Bottlecap refrigerator magnets

Quick and easy Bottlecap refrigerator magnets 

So for this project you will need an assortment of bottle caps from either microbrews or smallbatch soda pop. Preferably selecting bottle caps with interesting designs. You will also need a hot glue gun, magnets that will fit inside the bottlecap, and something to use as a spacer such as a piece of Styrofoam, sliced wood dowel or piece of plastic.
 Place your bottle caps upside down on the work surface as shown in the photos below. Hot glue your spacer inside the bottlecap. Make sure your spacer sit evenly with the edge of the bottlecap in thickness. If you do not have a spacer fill the bottlecap with hot glue and let cool. The reason for letting the glue cool is that if you place the magnet on the hot glue while it is still hot the magnet will sink out of sight.
You will want the magnet to set above the edge of the bottlecap so if the bottlecap magnet gets moved it is less likely to scratch the refrigerator. If you're concerned about scratching the refrigerator apply a small bead of hot glue around the sharp edges. Another option is to buy a cookie sheet from the dollar store and use it to display your magnets on.

 Once the glue has cooled the magnet is finished and ready to use or give as a gift. It is also a great way to keep track of all the great beverages that you drink or just to collect bottle caps.
The following is a short video on how to make the magnets.

Thursday, November 5, 2015

DIY custom craft micro clamps

Do you need a micro clamp but don't want to spend the money? Here's a quick DIY micro clamp made from clothes pins.


Micro clamps can be made cheaply from a package of close pins purchased from the dollar store. As you can see they can be made in an assorted shapes and sizes to meet your custom needs.

 You can use a belt sander, disk sander, Dremel or whatever you happen to have. I have even used a scroll saw to cut various shapes and sizes. My preferred method is still to use a belt sander with a course grit but that is only because it is quick and easy.

These clamps can be made in a minute or less and not only do they come in handy for various projects, I have also found them to be in demand at craft and trade shows. I usually sell them as an assorted package of 4 for a dollar.
They can be used for various projects such as holding projects while I'm painting them, or holding parts together as they are being glued. Uses are many, and if you know a crafter in need of clamps, they make a great gift.


This is a short video of how I make my micro clamps from cloths pins.

Tuesday, November 3, 2015

Suitcase into storage craft box

  Setting up at a craft show can be a pain, carrying boxes and totes can be cumbersome and sometimes hard to manage. And then there are times we just simply want a convenient place to carry our crafts when we are on the go. Or maybe we want a special place to put children's activities when they come to visit.
    One of my favorite haunts are yard sales and flea markets. I am constantly finding items to be upcycled, or restored into something new and wondrous. On one such trip I came across a couple of vintage suitcases that were in very poor condition. Although I may have restored them to their original condition I had something less expensive and much better in mind. Going to a craft show with a couple of suitcases seemed much easier than carrying several totes.

I started by painting the outside of the suitcase with a quality exterior house paint. This would help hide any blemishes and give a good protective coating to the outside of the suitcase. Once I had a good protective coating on the outside, I began decorating. First by using one of my favorite stencils to stencil a favorite slogan on the top of the suitcase. This personalize the suitcase and gave it more character. Later I would paint the brass fittings with a nice nail polish to protect them and to make them stand out.
    The inside of the suitcase was in pretty bad shape, with the original felt extremely well-worn and in some places holes. The only option here was to replace it with new felt, which I got at the local fabric store. Using a spray adhesive I cut and placed new felt over the top of the old felt. Once the new felt was in place I tack down the edges with hot glue. I hid this seems by brushing the edges of the seams with a stiff toothbrush.


     I continue to add embellishments from time to time, such as these butterfly stickers. Decorating the suitcases is a matter of using your imagination. One could use a theme such as Alice in Wonderland or use a vintage theme such as travel stickers or decoupage old newsprint or even sheet music. The uses for these suitcases are many, such as costumes and activities for kids or just plain storage for your arts and crafts projects and tools. The possibilities are limitless and should you ever become bored with what you have created it is simply a matter of putting on a new coat of paint and changing the style.


Thursday, October 15, 2015

3D Pen holiday ornament ideas

Using a 3-D pen with a tennis ball used as a form

   One of the big disadvantages of a 3-D pen is the lack of precision. Unlike a 3-D printer the 3-D pen relies not on a computer but on how skilled you are with your hands. However you can compensate on some things by using a form rather than just creating freehand. Here I am using a tennis ball as a form to create a Christmas ornament, but realize that any ball that can withstand the heat from the pen can be used. And any size ball can be used to create even more than just ornaments, such as using a basketball to create a lampshade. You may wish to cover your ball with masking tape or some other material so the plastic does not melt into the ball. I'm using the tennis ball basically because that is what I have handy and the plastic adheres enough to the ball to make it easy to control. The disadvantage of using a tennis ball is all the small fibers that the plastic adheres to. This can make removing the finished ornament rather difficult. The trick I use to overcome this is the use of a old painter's palette knife. Using the knife as I work, I periodically carefully lift the plastic off of the tennis ball. A thin blade screwdriver could also be used in the same manner. Just be sure to lift the plastic as you work rather than trying to do it all at once at the end. If you try to wait until the end, it becomes extremely difficult to lift the plastic without breaking it.


    Once you have removed your ornament you then can began to remove the fine hairs with a lighter or hot knife. Be sure and move quickly so as not to melt the plastic ornament you're working on. Most of the ornaments that I create are shaped similar to a half finished death Star. If you wish to create a full sphere, you need to create two halves and then weld them together after you have removed them from the tennis ball form. One trick I use is to create the ornament using the lines on the tennis ball, rather than a straight half circle. This also helps hide any seem that is created when I weld the two halves together, as it is not a straight line.

     So here we have our finished ornament and all that is left to do is to add a bit of thread or ribbon to hang it by. We can also add lace, beads, crystals or other decorations to the ornament as well as sand and paint the ornament as needed. The type of artwork you use is up to you and I have personally created ornaments for all the seasons, not just Christmas. So have fun and enjoy creating a little bit of artwork with your 3-D pen.

Ideas for 3D Pen Costume Projects

3D pen Halloween or Mardi Gras mask

    As I have said before the only real disadvantage of the 3-D pen is its precision, but it makes up for that in its versatility and scalability. Take for instance creating costumes or costume accessories. The pen is not limited by a print table size. I can create a mask or wardrobe accessory of any size. To offset its accuracy I use a form such as a cardboard mask in the photograph below.

The mask can be found in just about any craft or costume store. It is designed as a blank mask to be decorated but I have found that it works much better as a form. It is not plastic but pressed paper or cardboard which makes it perfect because it is heat resistant. The extruded plastic will stick to the paper which helps your work from moving around uncontrollably. The plastic mask I have found are usually far too thin and would melt. 
   
Using various artisan hash designs like those that you would use in sketching or drawings work very well for the 3-D pen. Here I have used circles for the bottom half and ?'s for the upper half. You may want to practice or try out different designs on paper with a pencil first. Practice making the same shapes until you are consistent with the size and shape you want. Keep in mind that the 3D pens work very similar to a welder on a micro scale. Practice using the pen forward and backwards or a back-and-forth motion when you are extruding filament. Using the pen in different directions will give you different thicknesses in the plastic that is extruded. Also keep in mind that as you are working, you need to periodically lift the mask off of its form using a artisan palette knife,
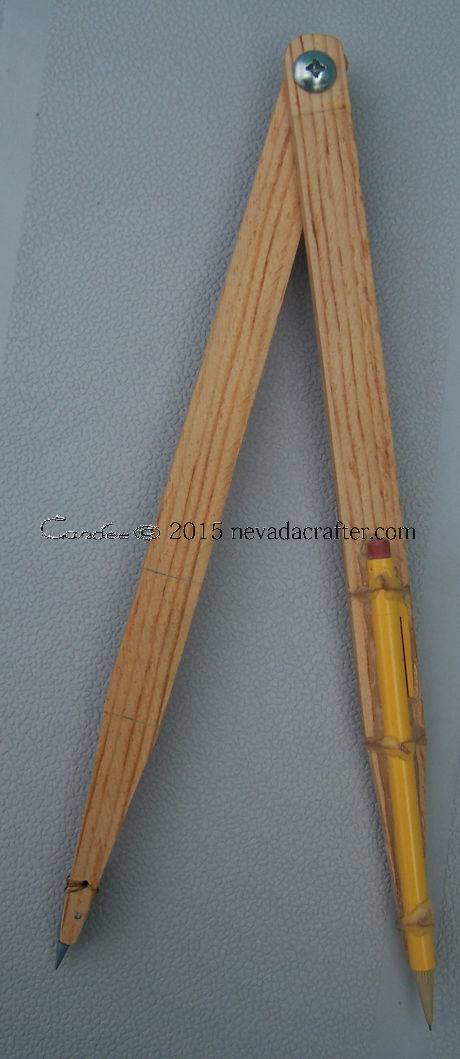
Stainless Steel Painting Knife Spatula or thin flat blade screwdriver. The plastic will have a tendency to stick to the mask which is a good thing as it will keep your work in place, but if you wait until you are completed, your project will be extremely difficult to remove from the mask without breaking it. And if you should break any part of the mask just remember that can weld it back together with the 3-D pen. Be sure and save your blank form for repairs or modifications should you need to make changes at a later date.

3D pen Halloween or Mardi Gras mask

    As I have said before the only real disadvantage of the 3-D pen is its precision, but it makes up for that in its versatility and scalability. Take for instance creating costumes or costume accessories. The pen is not limited by a print table size. I can create a mask or wardrobe accessory of any size. To offset its accuracy I use a form such as a cardboard mask in the photograph below.

The mask can be found in just about any craft or costume store. It is designed as a blank mask to be decorated but I have found that it works much better as a form. It is not plastic but pressed paper or cardboard which makes it perfect because it is heat resistant. The extruded plastic will stick to the paper which helps your work from moving around uncontrollably. The plastic mask I have found are usually far too thin and would melt. 
   
Using various artisan hash designs like those that you would use in sketching or drawings work very well for the 3-D pen. Here I have used circles for the bottom half and ?'s for the upper half. You may want to practice or try out different designs on paper with a pencil first. Practice making the same shapes until you are consistent with the size and shape you want. Keep in mind that the 3D pens work very similar to a welder on a micro scale. Practice using the pen forward and backwards or a back-and-forth motion when you are extruding filament. Using the pen in different directions will give you different thicknesses in the plastic that is extruded. Also keep in mind that as you are working, you need to periodically lift the mask off of its form using a artisan palette knife, painting knife spatula or thin flat blade screwdriver. The plastic will have a tendency to stick to the mask which is a good thing as it will keep your work in place, but if you wait until you are completed, your project will be extremely difficult to remove from the mask without breaking it. And if you should break any part of the mask just remember that can weld it back together with the 3-D pen. Be sure and save your blank form for repairs or modifications should you need to make changes at a later date.
    Once you have completed your mask you can now sand and paint it a different color or add any embellishments, such as beads jewels etc. I use embroidery floss or ribbon to hold the mask on, as this gives it a Victorian style or feel. This looks more professional and will fetch a higher price if it doesn't look like a kids toy with an elastic band.
It should be noted that these masks can be modified and updated at a later time. Being able to change or modify what you create is one of the things that appeals me, not to mention being able to make repairs to anything that is damaged. What this amounts to is a costume design that will not only last a long time but a design that you will never get bored with.
Modified and updated mask with added eyelashes and flower.
    Once you have completed your mask you can now sand and paint it a different color or add any embellishments, such as beads jewels etc. I use embroidery floss or ribbon to hold the mask on, as this gives it a Victorian style or feel. This looks more professional and will fetch a higher price if it doesn't look like a kids toy with an elastic band.

Monday, March 23, 2015

Paintbrush cleaning and storage jar

Often we are throwing out and replacing paintbrushes that were left to sit in the bottom of a jar. This flares and ruins the brush and if left long enough dried out, brittle and useless. This can be expensive, time-consuming and just a plain waste.  But here is a jar that will keep your paintbrushes like new. It is a simple and easy DIY to make with found materials. And can be sold at arts and craft shows for several dollars.

 The jar stays sealed and suspends paintbrushes off the bottom of the jar. Liquids can be added to the jar for cleaning the brushes. The jar is airtight and thus maintains a plasticity of the bristles.

The lid consists of a mason jar ring, a mason jar lid with a hole cut in it and a piece of rubber cut from a tire innertube. Cut the innertube to the same size as the mason jar lid and place it on top of the mason jar lid when assembling. Punch several small holes in the rubber innertube, preferably with a leather punch. Make the diameter of the holes slightly smaller than the handle of the brushes being used. (This is to keep an airtight fit around the handle of the paintbrush and to help hold the brush in place when it is being suspended off the bottom of the jar. )It is important that you use some type of hole punch to keep the holes from splitting and allowing air in the jar.
I use a glass jar and metal lids because the paints and solvents I use would dissolve any other type of container. But if you're only using water-based paints then a plastic jar or cup could be used.


To add paintbrushes to the jar simply push the handle of the paint brush up through the bottom of the lid and through the holes in the rubber seal that you have made. Adjust the brush so that the brush is not sitting on the bottom of the jar and there you have it. The perfect paint brush cleaning and storage jar.

Monday, October 7, 2013

Cheap DIY Fly or wasp trap and bait

Homemade insect trap
fly, wasp or hornet.


First we start with a soda bottle.The one in the photo is a 1 L bottle but a 2 L bottle will also work. 
Cut the top off has shown.
Invert the top and shown.
At this point you can glue or tape the inverted top in place. You can also add a couple holes at the top edge for a wire or string hanger,as in the following photo.
The bait I use depends on the type of insect that I wish to trap.

houseflies: one egg in 1 cup water blended. (If you use a 2 L bottle you may wish to use 2 cups of water instead of one.) This bait will work immediately and does not need to sit and ferment for it to work. 

wasp or hornets: use 1 to 2 cups of Coke soda (not diet) 

IMPORTANT NOTE:
Place trap away from your house, as after a few days it is going to smell real bad. This will also draw the insects away from your home. Egg wash bait will also attract animals, so be sure to place trap out of reach of dogs, cats, skunks and other animals.

When all of your insects have drowned in the trap and it is full, simply throw away entire trap.


Tuesday, June 25, 2013

DIY remote camera trigger for non-remote cameras

DIY remote camera trigger for non-remote cameras
The remote trigger uses a sandwich box, two hypodermic syringes( which can be found at any veterinary supply) 60 mL syringe and a small 3 mL syringe, connected by 25 feet of vinyl tubing. A pencil head eraser is glued to the small syringe plunger. The small syringe is mounted through a whole in half-inch white PVC pipe and is held in place with O-rings (the PVC pipe is for added stability to the small syringe). A rope can be threaded through the PVC pipe so it can be hung in a tree. The camera is mounted inside the box by threading a tripod mount through a hole drilled in the bottom of the sandwich box. Simply cut a hole in the lid for the lens of the camera. To operate the camera trigger simply move the large syringe back-and-forth to move the small syringe up and down. You could also use a tripod like this one with the sandwich box and mount the camera just about anywhere.

Photos of humming birds taken with rig.

The one nice thing about the rig is that humming birds don't hid from you. Normally humming birds will feed on opposite side of feeder, making it hard to get photos close-up. Original photos were taken with 14 megapixel camera and would be poster size. Re-sizing was done for web publishing and copyright protection.