DIY Drawing Compass
A drawing compass can come in handy, but most are the size kids use in school. I quickly found out that here locally, there were no large compasses to be had. Not only do they come in handy for my own art work, but there is some demand for the compasses them selves. So I present the following approximate pattern and photos of the one I made.
(Please note: pattern may not be exact or to scale and some adjustments may need to be made. The pattern is presented as an approximate to the original and is intended as more of a guide. It should also be noted that the pattern may need adjusting depending on materials used and thickness of wood or other materials used.)


Note: 1/4 " wood was used

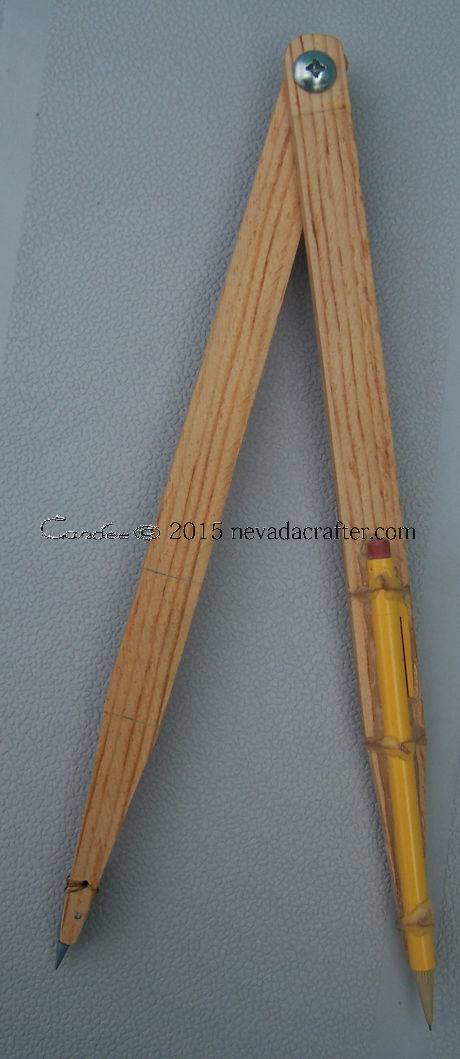
I used glue to hold and position the mechanical pencil and metal point. I then used wire to hold them in place while the glue set and left them in place to add strength. Any point can be used for the fulcrum, such as a nail, push pin, ect.
Of course when I am making them for sale, I take care to use much nicer material, such as brass nails, ect. The size circle you can draw depends on how long or how many joints. A second screw and wing nut in the middle of the fulcrum, but I find it just as easy to just make the compass bigger.
I hope this idea is of help to the crafters and artists out there that need to make big circles and great art. Thank you for taking the time to read my blog and please check out our other blogs and subscribe. Please feel free to make constructive comments or suggestions.